Enabling DKIM signing for your domains can help you keep your email content intact throughout the delivery process, barring threat actors from accessing and altering your emails. This helps preserve your identity and eradicate spam and phishing attacks. You have to use a subdomain of your parent domain to dedicate to Crisp servers.
- For example if your company is GreenLight inc, and runs greenlight.com
- And if you are using an email provider on @greenlight.com, like Gmail or Outlook
So you cannot use the parent domain which is already taken, you need a sub-domain of greenlight.com for dedicating to Crisp emails like -
Creating a custom email domain for Crisp
On the Crisp Dashboard:
- Go to app.crisp.chat
- Go to Settings > Website Settings > Pick your website in the list
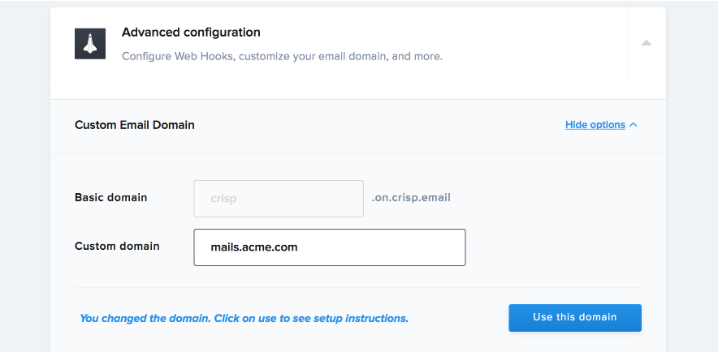
- Scroll down, and open Advanced configuration, then select Custom Email Domain
- In the field asking for the domain, enter your desired Custom Email Domain (eg. mail.greenlight.com)
- Click on Use this domain, then instructions will appear
- Do not click on verify yet,
- Connect on your DNS Manager (Cloudflare, Namecheap, ...)
- Add the DNS records provided by Crisp, one by one.(SPF/DKIM included)
- Now, click on Verify domain setup. Crisp will query your DNS records to ensure they are properly configured. This takes up to 20 seconds
- Crisp will acknowledge or reject the domain change. If it rejects the changes, check all records have been added to your DNS manager
- Publish this record in your DNS records section for your respective domain.
Enter your custom email domain and click use this domain
DNS records are generated, make sure to add them to your DNS manager
Lookup and validate the published DKIM DNS record using our free DKIM record lookup tool. Enable DMARC for your domains to protect against spoofing. Sign up for a DMARC trial today!


