DKIM is a popular email authentication protocol that exists in your DNS as a TXT record that helps in authenticating messages sent from your domain. DKIM signs your outbound messages with a cryptographic signature that is matched against a public key that resides in your DNS by the email receiving MTA. If it is a match, messages pass DKIM. DKIM along with DMARC helps to make your emails safe again.
Steps for Namecheap DKIM Setup
Generate your DKIM keys with our free DKIM record generator
Log in to your Namecheap account
Navigate to your domain from the Domain List and click on Manage
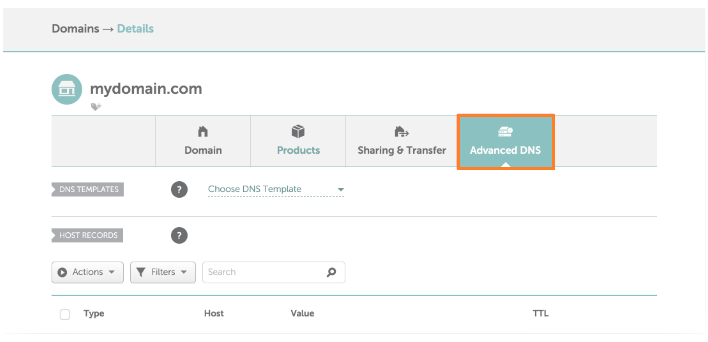
Now, click on Advanced DNS
You will find the DNS section wherein you can insert your new record
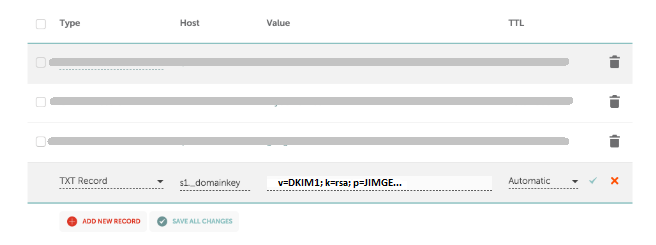
Click on Add New Record
In order to add the new DKIM record: Choose TXT as the record type, and s1._domainkey as the hostname, where s1 is your DKIM selector. Now add the generated record value in the Value field.
Click on the Save All Changes button
You can check your published DKIM record using our free DKIM record lookup tool.
And with this, you are done adding a DKIM record in Namecheap. Sign up for your free DMARC analyzer to enhance your domain’s email security further.


