The signing of DKIM happens automatically inside Infusionsoft using a CNAME record that is placed in your DNS, so you don’t need to worry about dealing with the details. Infusionsoft takes care of signing all of your outbound emails with DKIM for you. This ensures that all email sent from your domain is legitimate and untampered with.
Enabling DKIM for Infusionsoft: Step by Step
Log in to your Infusionsoft account
Navigate to Marketing > Settings
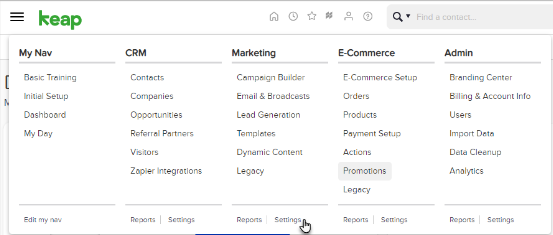
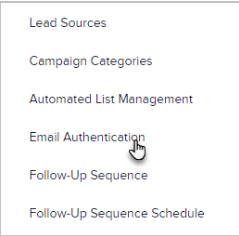
Select Email Authentication
Click on Add a Domain
Enter the domain name for which you want to enable DKIM (or select from the drop-down list)

You will now be able to see a single CNAME record generated for your domain.

Create a new CNAME record using the text shown above as the “Name” or “Host”.
Copy the CNAME record and paste it into your domain’s DNS in the “Value” field.

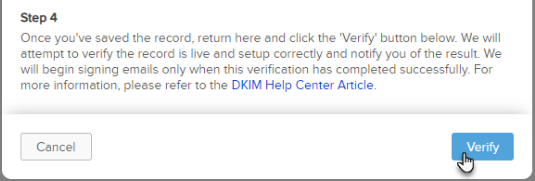
Wait for your DNS to successfully process the changes after saving changes
Log back into your Infusionsoft account and Click on Verify
Ensure that your DKIM record is without errors and valid with the help of a DKIM lookup tool. Finally, in order to start receiving reports on your authentication results, sign up for your DMARC analyzer today!