In order to setup DKIM for Mimecast, it requires a signature to be applied to your emails for which you have to generate a public and private key pair using your Mimecast account. To do this you will have to create an Outbound Signing Definition and an Outbound Policy to apply DKIM to your outbound emails.
Steps to Setup DKIM in Mimecast
Login to your Mimecast account
Navigate to Administration dropdown menu, and on the menu select Gateway > Policies

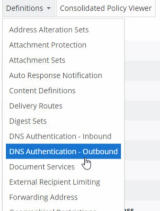
In the Policies page, click on Definitions, and from the dropdown menu select DNS Authentication - Outbound
Now to create a new DKIM policy, click on New DNS Authentication – Outbound Signing

You need to fill in the description box, select the domain from lookup list for which you want to setup DKIM, and name your DKIM selector
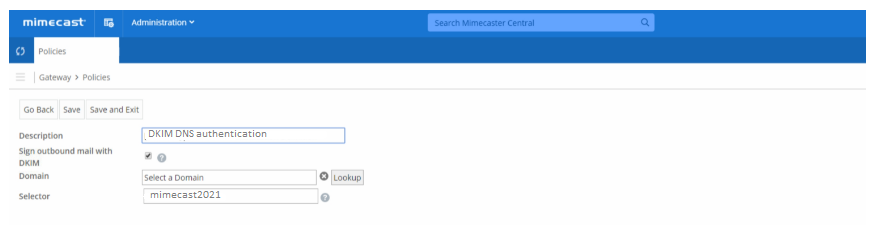
In the DKIM length category, you can select either 1024 bits or 2048 bits in you want more secure encryption. Then click Generate.

Your DKIM public key will be generated successfully for Mimecast. Now you can simply go to your DNS registrar and publish the DKIM key in your domain’s DNS for hostname: selector._domainkey.yourdomainname.com
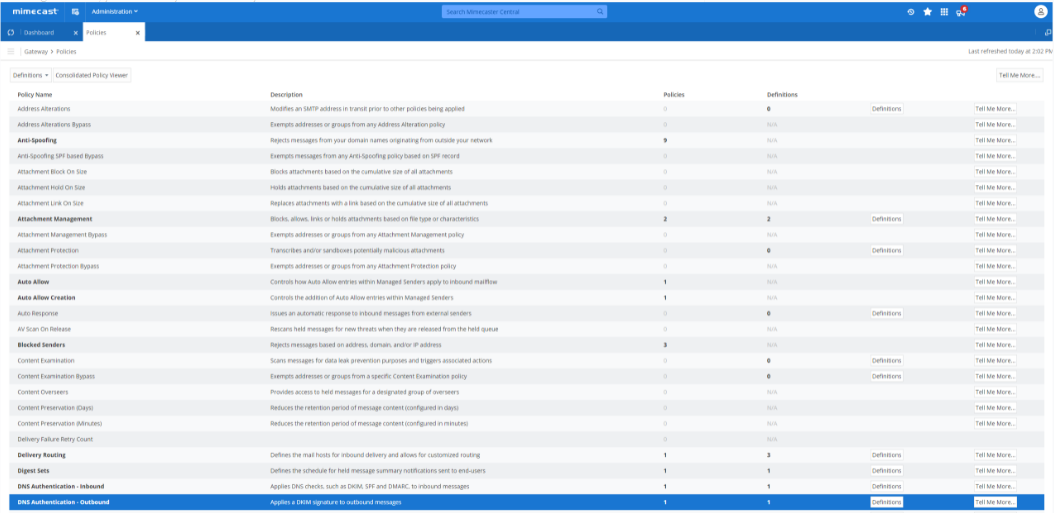
Once done with your outbound signing definition, next you need to create your outbound policy. For this go to Policies > DNS Authentication – Outbound
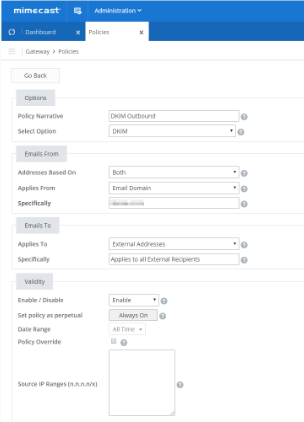
You need to add a new DKIM policy for your outbound signing with values as shown below:
In order to verify that your DNS has been added to your hosting environment, click on Check DNS in your Mimecast account

Make sure you get a verified status, and you are done!
Check your DKIM record using our free DKIM record checker
Sign up for your free DMARC analyzer today!
