Note: DKIM is not applicable if you have a custom mailbox
Enabling DKIM for Freshdesk is mandatory to activate domain verification. Domain verification is indispensable if you are using the default Freshdesk server as the email communication method. This makes sure that all emails sent using Freshdesk on behalf of your domain are signed with DKIM and are DMARC compliant.
Steps to Setup DKIM for Freshdesk
Login to your Freshdesk account as an administrator or super administrator
Navigate to Admin > Support Channels > Email Settings > Advanced Settings
In Advanced Settings, click on Configure DKIM
Freshdesk generates 4 CNAME records per domain name for DKIM configuration. Copy the records to your keyboard
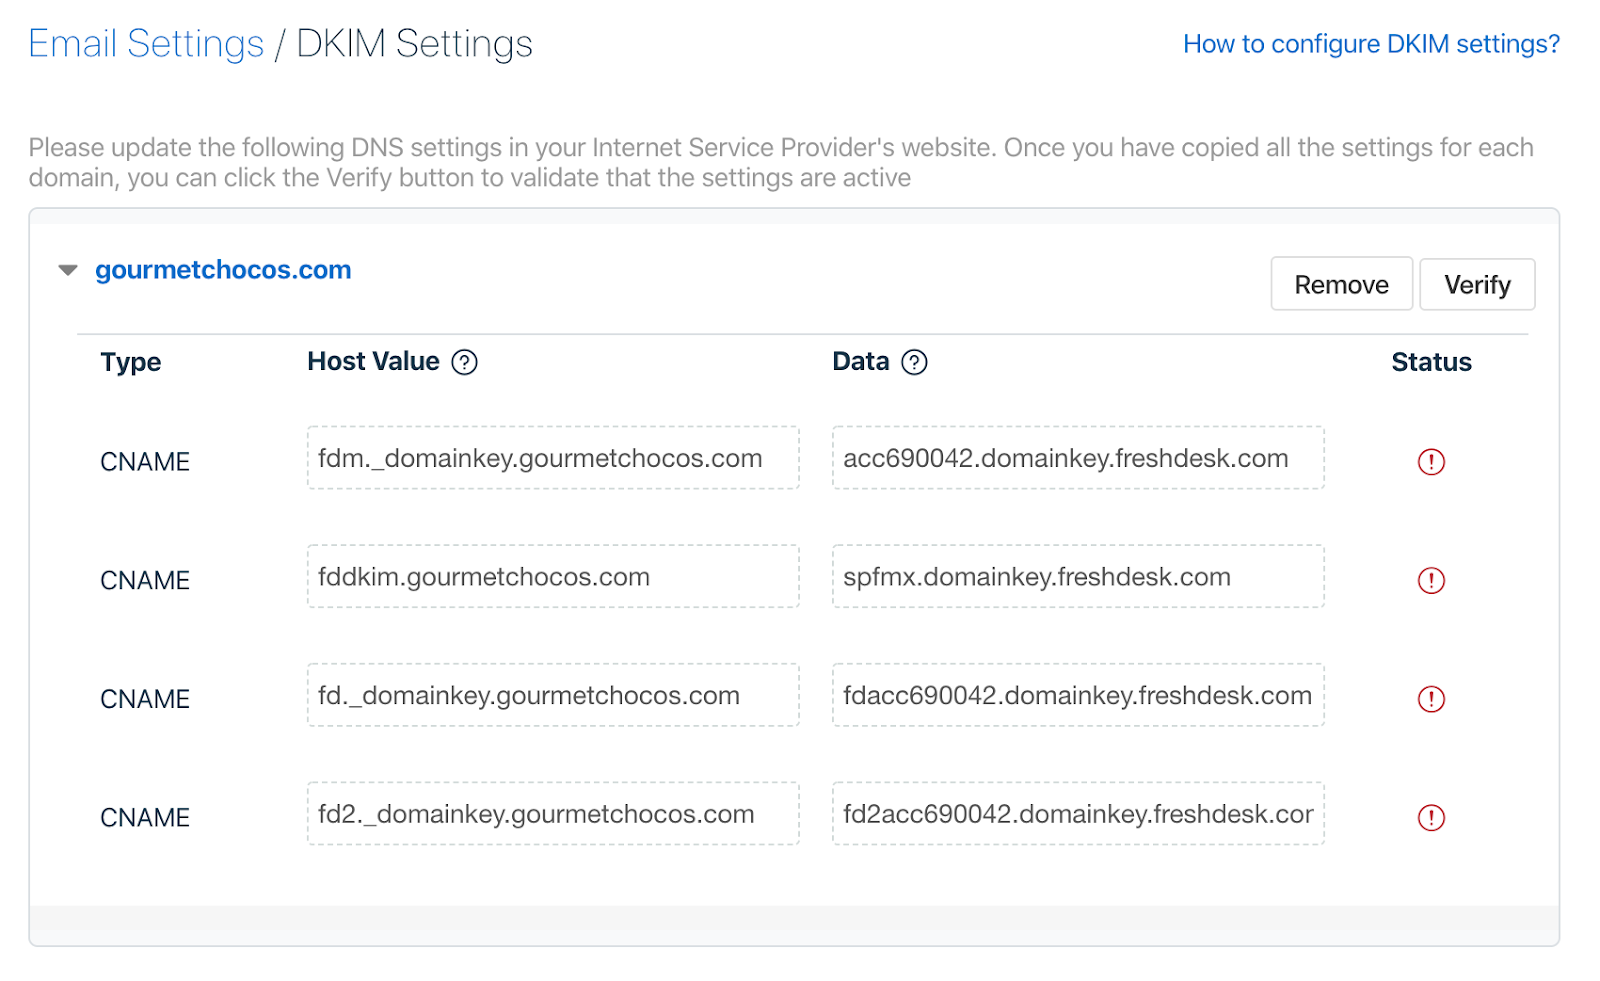
Open your DNS management console and paste the CNAME records in the allotted section for your specific domain
Save changes
Note that your DNS would require some time to process these changes
Open your Freshdesk account again and click on Verify, adjacent to your domain name in the DKIM configuration page
You should be able to see a verified status for DKIM against your domain name if you have published the records correctly in your DNS
You can check the validity of your DKIM record with our free DKIM record lookup tool. Hope this helped you successfully enable DKIM for Freshdesk.
Sign up for our free DMARC analyzer today!
