DKIM helps you sign your outgoing emails with an encrypted key which is used during verification by MTAs. It is an effective way to protect your emails from impersonation and abuse by fraudsters. You can enable DKIM for Plesk to start signing your emails every time you send them to your recipients.
Enabling DKIM for a Domain on Plesk
Note: DKIM is enabled for Plesk by default.
But if you want to enable it for a custom domain, follow the steps below:
In case you use Plesk as your DNS provider, go to Websites & Domains > your domain > the “Mail” tab > Mail Settings.
Locate the “Use DKIM spam protection system to sign outgoing email messages” checkbox and enable it.
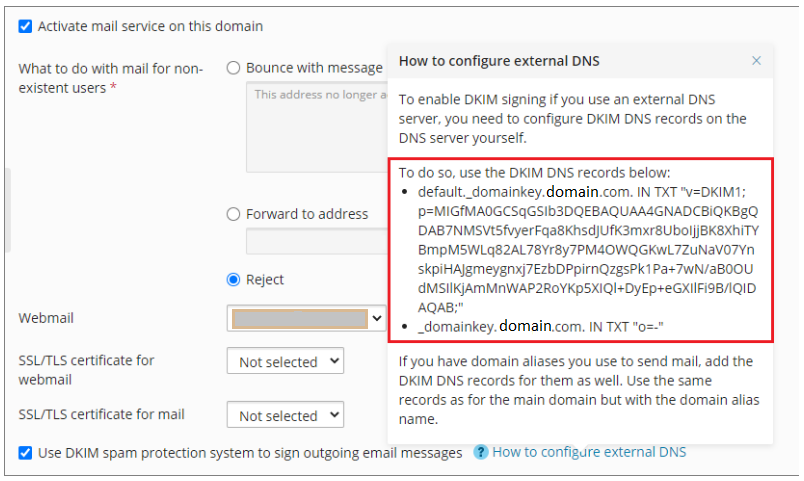
In case you use an external DNS server, you need to manually add the DKIM records for Plesk to your DNS by generating them on Plesk.
To do so, click on “How to configure external DNS”
Copy the 2 DNS records that are there:
Now you can login to your DNS and publish the record in the DNS records section to enable DKIM and save changes
It will take 24-48 hours for your DNS to process these changes.
Simply implementing DKIM is not enough to safeguard your domain from spoofing. Sign up for your free DMARC analyzer to maximize your domain’s email security.
