
Custom tags let you label your customer accounts with your own internal categories, such as service tier, rollout stage, or DNS provider. Once tagged, you can filter and sort your customer list by those categories instead of tracking them in a separate spreadsheet or CRM.
Why this matters: Tags give you a fast, visual way to segment your customer list without leaving PowerDMARC — no external tracker needed.
This article covers:
Opening the Manage Tags page
Creating a new tag
Editing or deleting an existing tag
Assigning tags to customer accounts
Filtering and sorting customers by tag
Opening the Manage Tags Page
Go to the Customer Management screen. In the top right of the Accounts / Users panel, click Manage Tags.
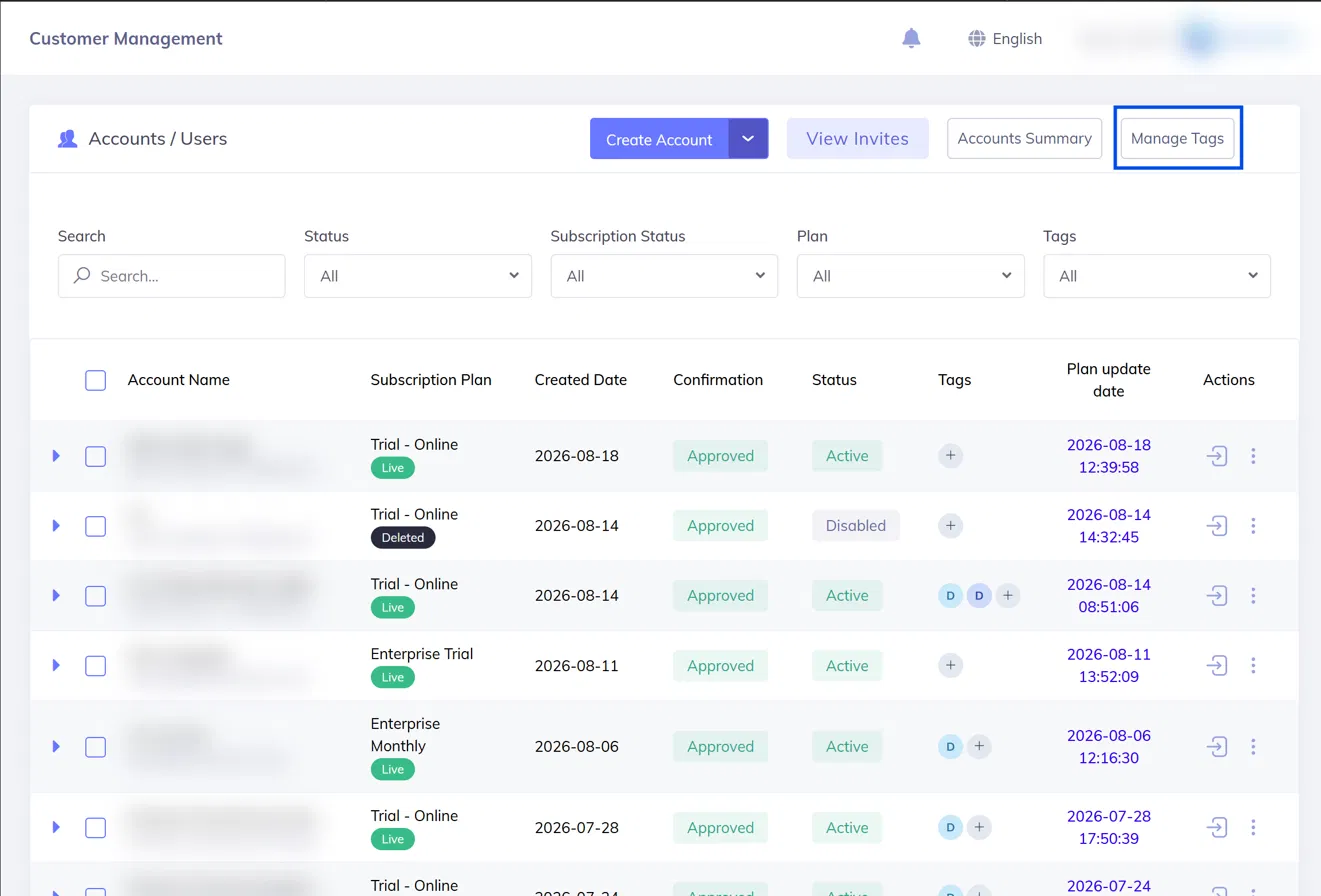
The Manage Tags button in the top right of the Accounts / Users panel
Viewing Your Tags
The Manage Tags page lists every tag you have created, along with its colour, the number of customers currently using it, and its created and updated dates.
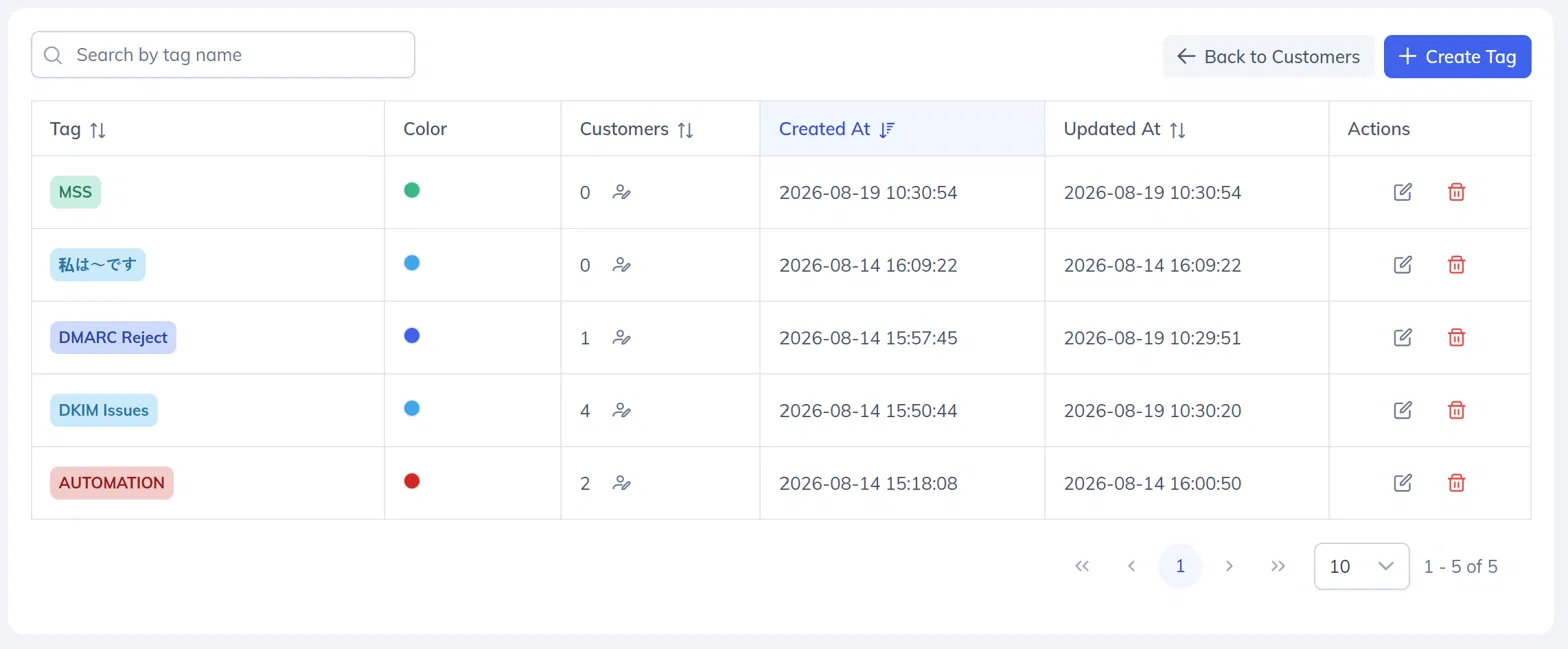
The Manage Tags page, showing colour, customer count, and created/updated dates
From this page you can:
Search for a tag by name using the search bar at the top left
Sort the list by tag name, customer count, created date, or updated date
Edit or delete any tag using the icons in the Actions column
Return to the customer list using Back to Customers
Creating a New Tag
Open the create form
On the Manage Tags page, click Create Tag.
Name the tag
Enter a Name for the tag. Names can be up to 30 characters and must be unique within your account.
Choose a Colour
Select a Colour from the palette.
Check the preview
Check the Preview to see how the tag badge will look.
Create the tag
Click Create.
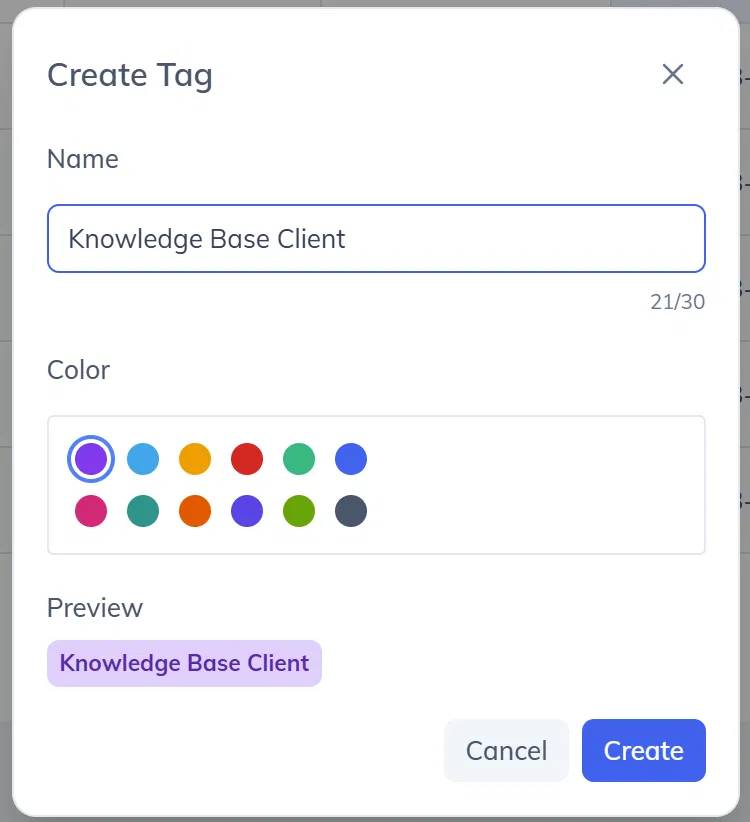
The Create Tag dialog, with name field, colour palette, and badge preview
The new tag is now available to assign to any of your customer accounts.
Editing or Deleting a Tag
To edit a tag, click the edit icon in the Actions column, change the name or colour, and save. The change is applied immediately to every customer already using that tag.
To delete a tag, click the delete icon in the Actions column. A confirmation message shows how many customers are currently using the tag.
Assigning Tags to Customer Accounts
Tags are assigned from the Tags column in the customer list.
Find the customer
On the Customer Management screen, find the customer you want to tag.
Open the tag control
Click the + icon in the Tags column for that row.
Apply tags
Start typing to search your existing tags, then select the ones you want to apply.
The tags are saved right away — no page refresh is needed.
You can assign more than one tag to the same customer. Assigned tags appear as coloured badges in the Tags column. If a customer has several tags, the first few badges are shown with a +N indicator for the rest, which you can hover over to view.
To remove a tag from a customer, open the same control and unselect it. The tag stays available in your Manage Tags list for other customers.
Filtering and Sorting by Tag
Filtering: Use the Tags dropdown in the filter bar at the top of the customer list, next to Status, Subscription Status, and Plan.
Select one or more tags to see the customers carrying them. Selecting several tags returns customers that have any of them.
The Tags filter works together with the other filters — for example, Status = Active plus Tag = VIP returns only active customers tagged VIP.
Select No tags to find customers that have not been categorised yet.
Sorting: Click the Tags column header to sort customers alphabetically by their first assigned tag. Customers with no tags always appear at the end of the list.
Example Tags
Tags are entirely up to you. Some common ways MSSPs use them:
Notes and Limits
You can create up to 50 tags in your account, and assign up to 10 tags per customer.
Tag names must be unique within your account and can be up to 30 characters.
Tags are visible only inside your own panel — customer accounts never see them.
Creating, editing, and deleting tags is available to the admin. Any user with access to the Customer Management screen can assign or unassign existing tags.
For further assistance, visit support.powerdmarc.com or contact your PowerDMARC account manager.