This documentation describes the SAML Single Sign-on feature guide for the account/user. The document includes detailed steps for activating the SAML SSO feature, information about permissions that can affect access to this feature as well as configuration steps for Azure AD, Google Workspace, OneLogin, JumpCloud, and Okta identity providers.
To get access to the SAML Single Sign-on for the account/user, the following steps should be completed:
The subscription plan should support SAML Single Sign-on
The account should be active
The super admin of the account and users should be active


Steps for configuration SAML Single Sign-on
Login to the main user’s account
Go to the settings and click the SAML Single Sign-on
Click the Connect Identity Provider button
On the opened page type the connection name


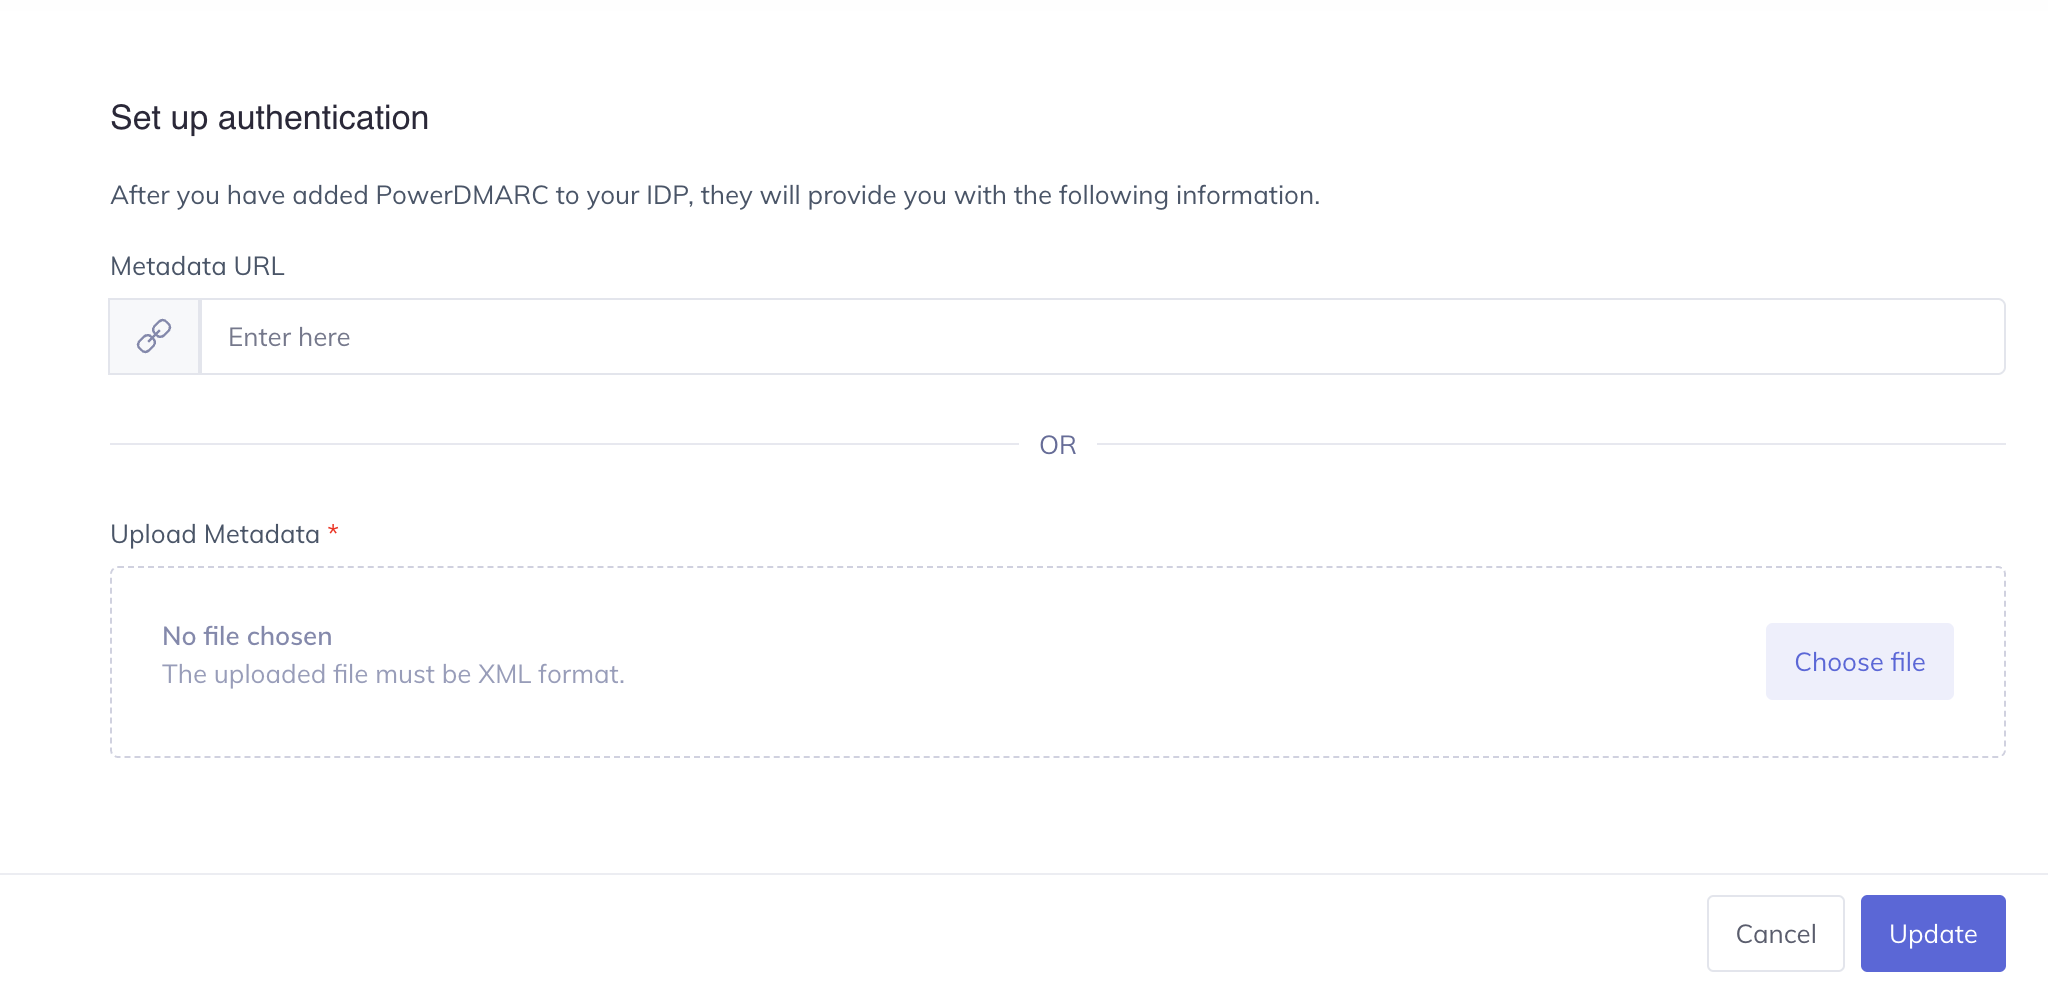
Copy the Assertion Consumer Service URL and add it to IdP app configuration page
Download the SAML metadata from IdP after adding the ACS and Entity ID URLs
Upload the downloaded metadata to the platform or paste the metadata link to complete the configuration process
Enable or Disable the "Force IdP Re-authentication" option
Enable or Disable "Prepopulate the User Email Address"
Click the Create Connection button
Your connection is created!
Steps to sign in via SAML SSO
Navigate to the Sign-in page and click the Sign-in with SSO link

Enter your email address and click the Continue button

You will be redirected to the IdP side to provide the username and password
After passing the authentication on the IdP side you will be redirected to your account on our platform
Managing SAML IdP Certificate Expiration & Renewal
To prevent login disruptions caused by expired SAML certificates, PowerDMARC provides visibility and management for Identity Provider (IdP) certificates used in SSO configurations. This allows administrators to monitor certificate validity, receive advance expiration alerts, and renew or sync certificates without reconfiguring the existing SSO setup.

Prepopulate User Email Address
If a user in IdP has a distinct username and a primary email address, ensure that the "Prepopulate user email address" option is unchecked in PowerDMARC.
Here's the recommended configuration for this scenario:
Example in Okta: Login with a username.
Navigate to your Directory > People
Click on “Add person”, fill in all the required fields, and click on Save


After creating your users, proceed to create an application
During the APP creation on Okta, ensure the following settings are chosen:


On PowerDMARC, during the creation of an SSO connection, ensure to disable "Prepopulate user email address"

Note: Configuring attribute statements on IdP and disabling "Prepopulate user email address" on PowerDMARC allows you to sign in via SSO to your account when your primary email and username email differ on Okta IdP. Verify that your Okta user's primary email address is added to PowerDMARC as well.

Force IdP Re-authentication
This allows enabling/disable a forced Re-authentication during signing-in via SSO. When the checkbox for “Configure IdP Session Management for Forced Re-authentication” is disabled in this section, it provides the ability to the IdP to keep your session active.

Important: Please note that simply configuring SAML SSO does not automatically grant access to users. You must also add users to the portal to ensure our system can identify them and allow SSO login.
We have dedicated, detailed guides for each of these IdPs, you can find them below:
3. Google Workspace SSO Setup Guide
Contact us for further information or assistance!