At PowerDMARC, we're continuously improving user experience to make domain security seamless and accessible. We’re excited to introduce our revamped domain onboarding UI, designed to help you configure your domain’s email security in just a few intuitive steps. Whether you’re new to email authentication or a seasoned expert, this new flow ensures you’re protected quickly and efficiently.
Here’s a step-by-step walkthrough of the new onboarding experience:
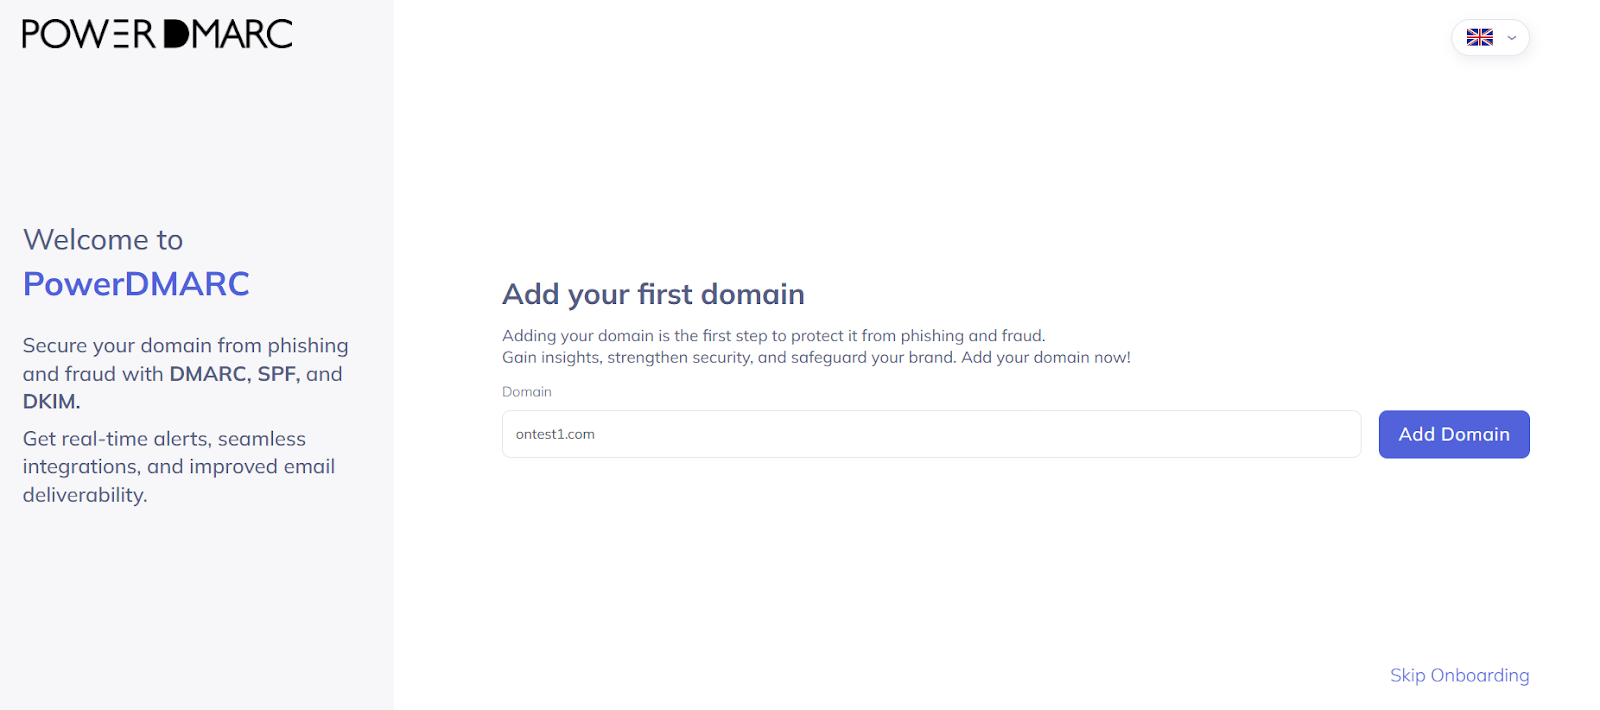
Adding Your Domain
Upon logging into the platform, users are welcomed with a redesigned interface that highlights the core benefits of PowerDMARC—real-time alerts, seamless integrations, and improved email deliverability. To begin, simply enter your domain name and click on the “Add Domain” button. This is the first step toward safeguarding your domain against phishing and spoofing attacks.
Not ready to complete the setup right away? No problem—you can choose to skip the onboarding for now and return to it at a later time.
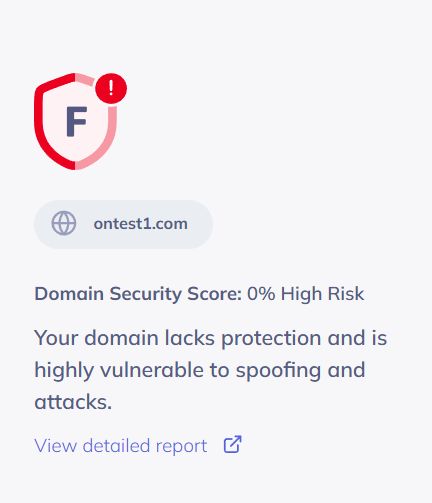
Once the domain is added, the platform immediately evaluates its security posture and generates a Domain Security Score, accompanied by a risk category (e.g., “High Risk” with 30%). This score gives users instant visibility into their domain’s vulnerability and provides a Detailed Report outlining current security gaps and inline recommendations.
Publishing DMARC Record
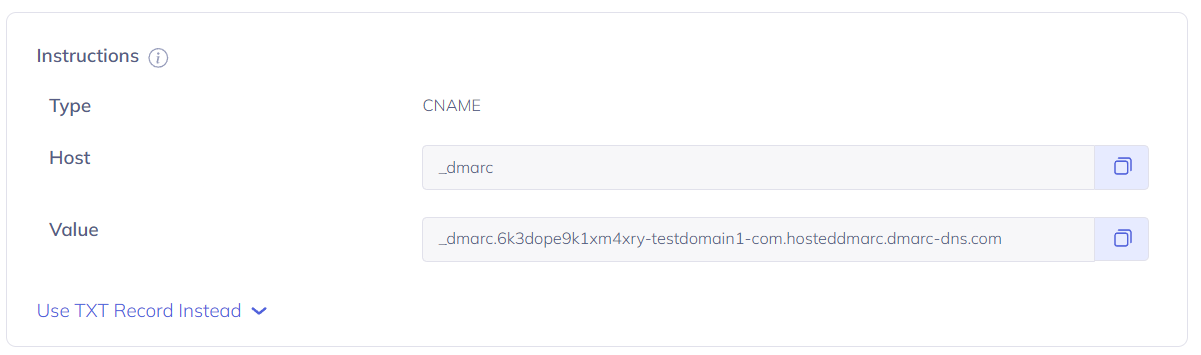
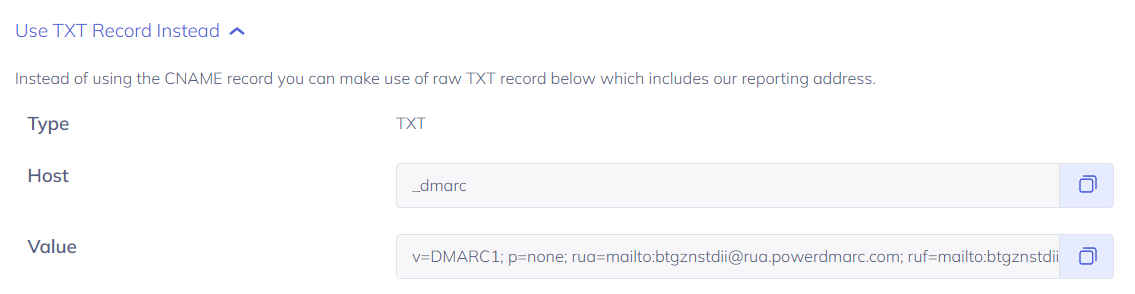
Following this, the wizard help the users publish the DMARC record for the domain added. PowerDMARC offers two methods: a conventional TXT record or a CNAME record for hosted DMARC.
Publish the DMARC Record to Your DNS
Hosted DMARC (CNAME Records): Publish CNAME records to enable the Hosted DMARC feature. This allows you to manage your DMARC record directly within the PowerDMARC portal. Any future changes to the record can be made in the platform and will automatically update your DNS.
Traditional TXT Record: Publish a TXT record on your DNS for the traditional DMARC setup. Any changes to the record will require manual updates in your DNS.
Auto DNS Publishing:
Use our Entri-powered Auto DNS Publishing feature to publish the DMARC record automatically.
No need to access your DNS manually, just a few clicks, and you’re done!
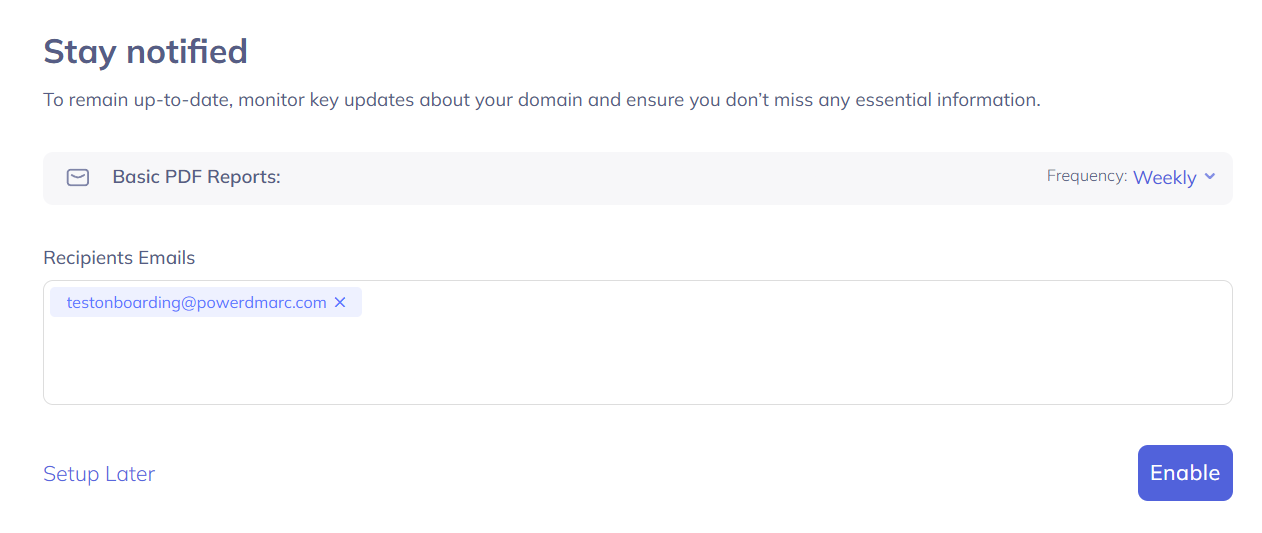
Set Up Notifications & PDF Reports
After setting up the DMARC record, users can proceed to configure the notification preferences. This wizard allows them to enable Basic PDF Reports that summarize DMARC compliance and email authentication. Additionally, Report frequency can be set to daily, weekly, monthly, or yearly. Users can configure the reports by adding the email address in the provided field to receive scheduled Basic PDF Reports. These reports provide a comprehensive overview of your domain’s DMARC compliance and email flow.
If you prefer, you can skip this step by clicking Setup Later and configure report delivery from the portal at a later time.
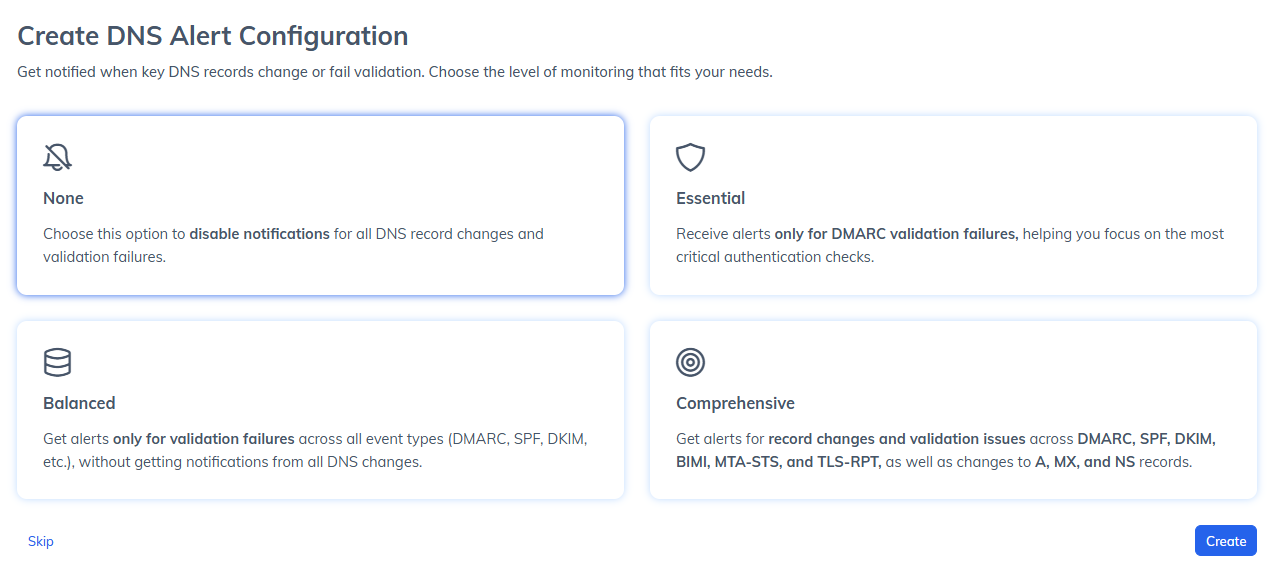
Create DNS Alert Configuration
As part of our enhanced domain onboarding experience, we’ve introduced a DNS Alerts Configuration step within the setup wizard. This allows administrators to proactively monitor DNS record changes and validation failures from the very beginning of domain setup.
During onboarding, you can choose one of four alerting modes based on your organization’s monitoring needs.
If you prefer, you can skip this step by clicking “Skip” and continue with the process.
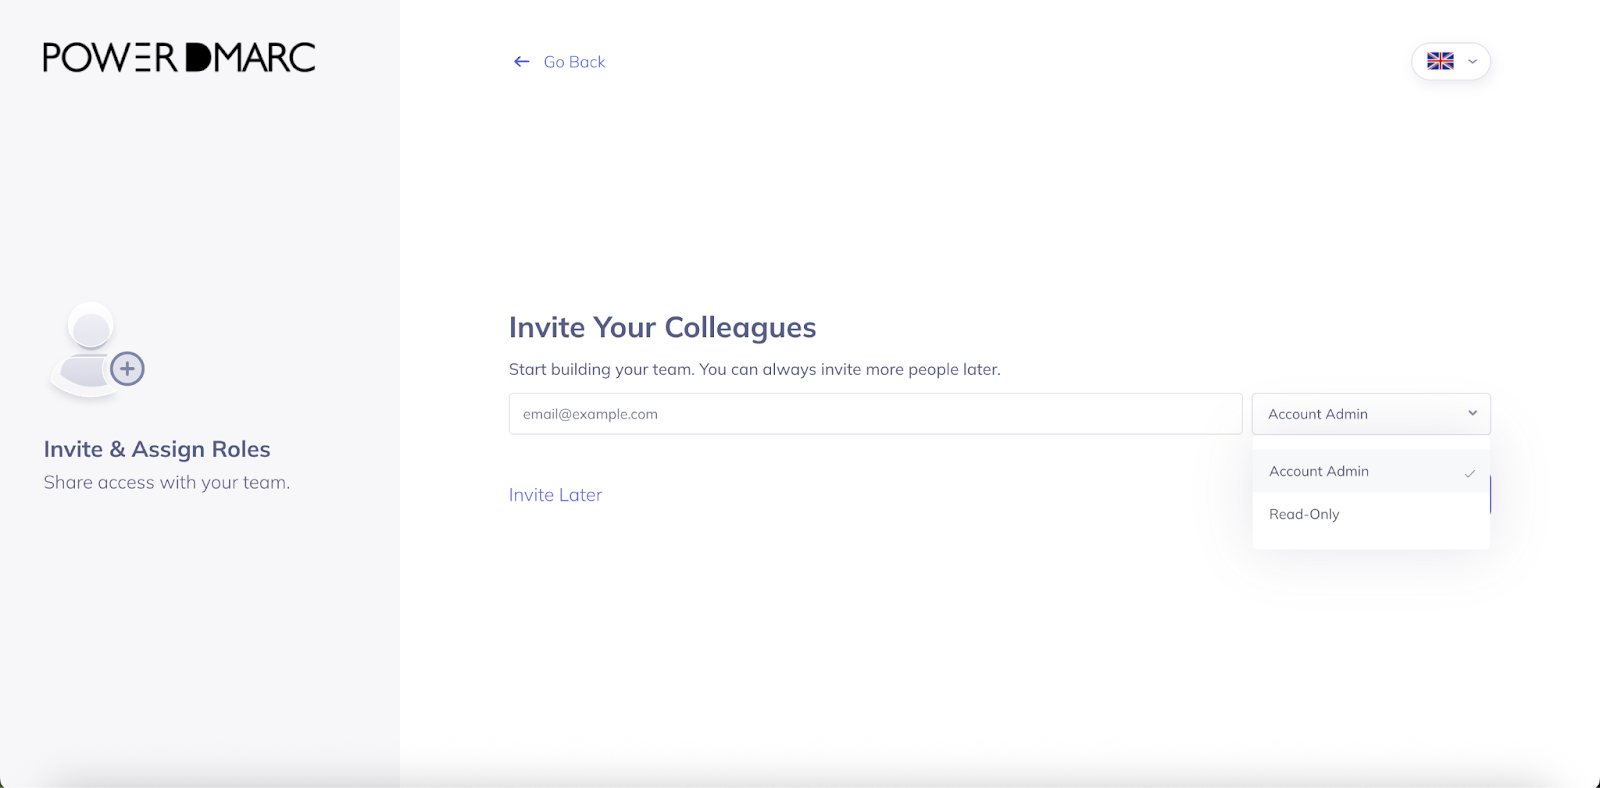
Invite Colleagues
Bring your team onboard by inviting colleagues to collaborate. Each team member can be assigned specific roles and permissions for streamlined domain management.
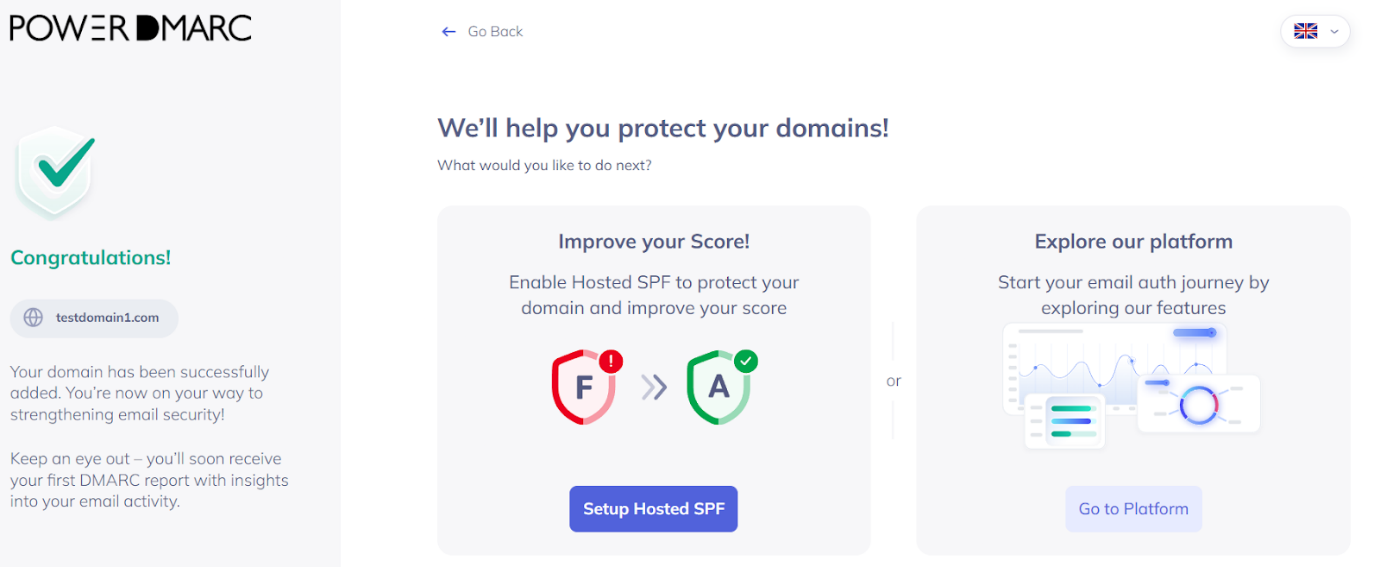
Confirmation – You’re All Set!
After completing the setup, you’ll see a confirmation screen letting you know that your domain has been successfully added. Great job—you're now on your way to building a stronger email security posture! From here, the users will have two simple options to continue:
Click “Enable” to activate Hosted SPF and boost your domain's protection and security score.
Click “Go To Platform” to enter the PowerDMARC dashboard, where you can start exploring features, view reports, and monitor your domain's email authentication in real time.
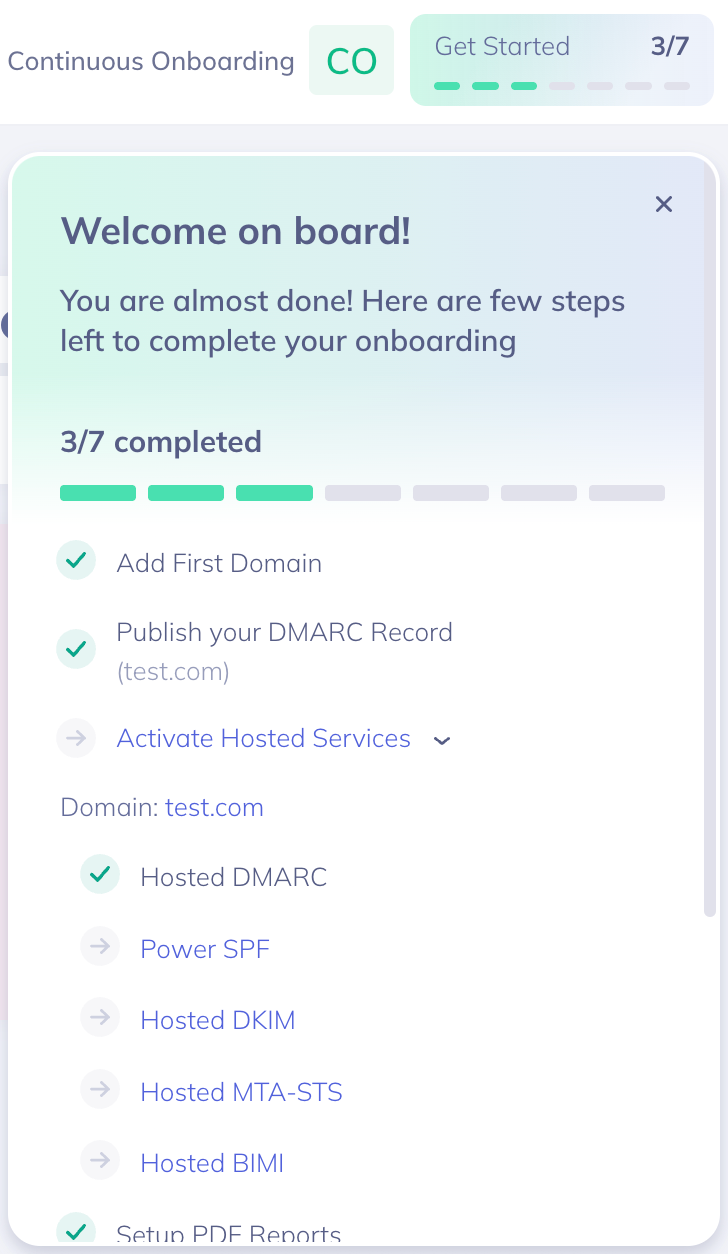
Interactive Checklist and Proactive System Notifications
We've improved our Continuous Onboarding experience with a comprehensive checklist system and smart trial notifications to help new users maximize their platform. The Checklist sidebar is enriched with a 7-step progress tracker.
Use the checklist as your personal to-do list
Don’t rush—steps can be skipped and revisited anytime
Leverage the Help and Training & Certification links at the bottom for additional guidance
Invite team members early to collaborate and speed up adoption
Complete setup guide covering adding domain, DMARC and other Hosted Services, reporting, team invites and video tutorials.
Receive Your First DMARC Report
Once emails start flowing through your DMARC policy, you’ll receive your first aggregate report. These reports help you identify legitimate and unauthorized email sources.
A Seamless Start to Domain Security
This new onboarding flow is built for clarity, speed, and control. Whether you're an IT admin, a security analyst, or a business owner, PowerDMARC’s guided setup ensures you’re well-equipped to protect your domain against phishing, spoofing, and unauthorized email activity. If you need assistance at any step, our dedicated support team is ready to help you secure your email infrastructure always.